There’s nothing like opening the window on a bright spring’s day or a cool autumn evening to let the cool, clean air flow through your house. But, if the screen is torn, you may also be inviting a bunch of unwanted critters in your home as well, like mosquitoes, flies, spiders and other insects. Therefore, if you notice a rip or a hole in your window screening, you’re going to want to fix it quickly so you don’t miss a day of beautiful weather. Depending on the severity of the damage, you may be able to simply repair the screen.
Home improvement stores sell easy-to-apply screen repair kits which include a piece of screening with an adhesive back that gets stuck right over the rip. If the screening is of the metal variety, you can take a piece of scrap screening, unravel a strand and use it to “sew” the cut together. Or, if the screening is fiberglass, you may be able to glue the cut sides back together or apply a patch over the damage and secure it with glue. For those screens with more serious damage, you will probably have to remove the screening entirely and install a whole new piece.
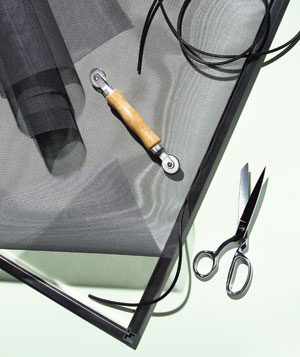
Tools and Materials For Metal-Framed Screens Flat-head screwdriver Putty knife Combination square Aviation snips Hammer Wood block New screen spline Replacement screen For Wood-Framed Screens Putty knife Utility knife Flat-head screwdriver Needle-nose pliers Staple gun with heavy duty staples Aviation snips Saw Plywood 1×2 Lumber 1×4 Lumber Replacement screen How to Replace Metal-Framed Screening.
Step 1: Remove the Frame & Cut the Screening. Remove the screened frame from the window and place it on a flat surface. Lay the replacement screen directly over the frame and cut the screen even with the outer edges of the frame.
Step 2: Remove the Old Screening, Insert the tip of a flat-head screwdriver into the spline channel and start prying the spline up. Once you have it started, you should be able to simply pull the spline out by hand. Once the spline is removed along all four sides of the frame, pull out the old screening.
Step 3: Crease the New Screen. Set the pre-cut piece of replacement screening over the frame and use a putty knife to push the screen into one of the longer channels. This is called “creasing the screen.”
Step 4: Install the Spline once the screen is creased, insert the spline to hold in place. Use a thin piece of wood and a hammer to tap the spline securely down, or use a screening tool to do the job. Crease and install the spline along the longest sides of the frame first and then follow the same steps for the two shorter sides. Once all four sides have been set, trim away the excess screening and return the screened frame to its place on the window.
How to Replace Wood-Framed Screening
Step 1: Remove the Frame & Cut the Screening. Remove the wood frame and place it somewhere flat. Lay the replacement screen over the frame and cut it to size using the aviator snips.
Step 2: Remove the Sash Molding. The screen is held in place by staples that are then covered over by the sash molding. Carefully pry away the sash molding using a putty knife. If the frame is older, the molding may be brittle so use caution when removing it.
Step 3: Remove the Screening Staples. With the sash molding removed, you should be able to see the staples. Use a flat-head screwdriver or needle-nose pliers to remove each of the staples and then lift away the old screening.
Step 4: Stretch the Screening. Wood frames do not have splines like metal frames do so it is more difficult to stretch the screen taut. Therefore, you should follow these instructions for stretching the screen for a wood frame: Set the frame flat on a piece of plywood Lay the screen over top of the frame so that it extends over one side Nail a piece of 1×2 (cut to the length of the frame) to the plywood surface Lay the screen over the first 1×2 and nail another length of 1×2 over the screen to hold it in place Cut a 1×4 piece of lumber diagonally into two wedge-shaped forms Insert the two pieces of 1×4 into the space between the frame and the 1x2sTap each of the wedges, alternating sides, until the screen becomes tight
Step 5: Staple the Screening. Starting in the center of the sash, staple the screening in place using a staple gun with heavy-duty staples (not everyday-use staples). Work your way to the sides, alternating staples left and right as you go to keep the tension even. Do this for both of the longer sides. To staple the screen on the short sides, simply pull the screening tight and start stapling from the center outward like you did earlier. Once all four sides are stapled, trim away the excess screening material and replace the sash molding.

Milford, MA 01757-3316
#Screen #DIY #Milford #MA #MetroWest #AreaGlass #WindowScreen #DoorScreen #StormDoor #Replace #Repair #DoItYourself


